Mastering the Art of Driftwood Creation: An In-depth Exploration Using Natural Branches
Introduction
Driftwood is a decorative element very popular for its natural and authentic appearance. It can be used in various DIY projects, such as creating a photo frame, a shelf or even a towel rack. In this guide, we will explain how to transform natural branches into driftwood by following a few simple and safe steps.
Necessary material
- Protective gloves
- Protective glasses
- Baking soda
- Hot water (or electric kettle)
- Wire brush (or scrub brush)
- Optional tools:
- – Abrasive paper (for sanding)
/list-item-option/>
- – Diluted bleach (to lighten the wood)
/list-item-option/>
Preparatory stages: choosing and cleaning the branches
- First of all, you must choose the branches that you want to transform into driftwood. Opt for pieces that have an interesting shape or that match the project you have in mind. You can find them in nature, on a beach or even buy dried branches in a store.
- Once your branches have been chosen, clean them using a wire brush to remove dirt and any plant debris. If you are working with wood found in the wild, make sure it is free of pests and insects.
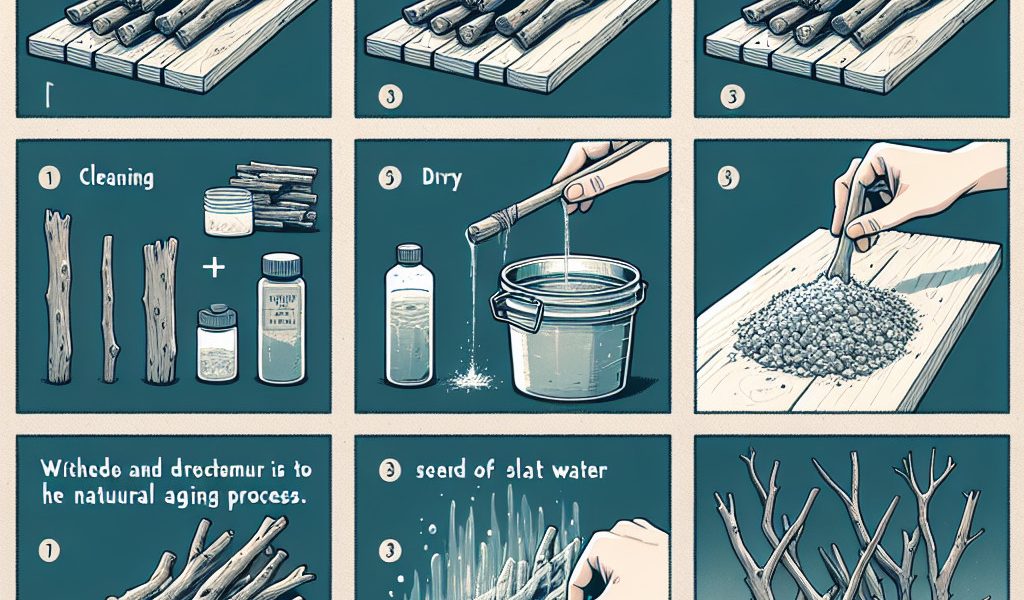
Step 1: Prepare the Baking Soda Mixture
In a suitable container (a bucket or basin for example), prepare a mixture of hot water and baking soda. The recommended proportion is approximately two tablespoons of bicarbonate per liter of water. This solution will accelerate the aging process of the wood and give it that desired floating appearance.
Step 2: Immerse the branches in the mixture
Put on your gloves and protective glasses, then completely immerse the branches in the prepared baking soda mixture. Leave them submerged for about 24 hours so that the solution acts effectively on the wood.
Trick :
To prevent the branches from rising to the surface of the liquid, you can use a heavy object like a stone or brick to keep them submerged.
Step 3: Remove and Rinse the Branches
After 24 hours, remove the branches from the mixture and rinse them thoroughly with clean water. Use a wire brush or scrub brush to remove any baking residue that may still be present on the wood.
Step 4: Let Dry
Allow your branches to dry completely, ideally in full sun for several days. The wood will then take on a characteristic aged and floating appearance.
Optional: Finishes
If you would like to add additional finishes to your driftwood, here are some options:
- Sanding: To soften the surface of the wood and remove any rough edges, you can lightly sand your branches with abrasive paper.
- Lightening: If you want to give the driftwood a lighter appearance, you can use diluted bleach (about 1 part bleach to 10 parts water) to lightly whiten it. Apply this solution carefully while wearing protective gloves and glasses.
Creative Uses for Completed Driftwood
Now that you’ve transformed your natural branches into beautiful driftwood, here are some ideas for creative uses:
- Create an original photo frame by gluing pieces of driftwood around a mirror or a photograph.
- Make a wall shelf by attaching several driftwood branches together, then hang it using ropes or chains.
- Make a unique towel rack for your bathroom using a long horizontal branch attached to the wall and small vertical branches to hang towels.
With these simple steps and a few tools, you can create driftwood from natural branches to give a rustic and authentic touch to your decorating projects. Don’t hesitate to give free rein to your creativity!