Breathing New Life into Antiques: Step-by-Step Guide to Transform Your Old Trunk into a Conversation Piece
Introduction
In this article, we will explain to you how to revamp an old trunk to give it a second life while retaining its old-world charm. Whether for storing your belongings, as a decorative element or even as a coffee table, the trunk is a versatile object that deserves to be highlighted.
Step 1: Choose your old trunk
First of all, you must choose the trunk you want to renovate. You can find them at flea markets, garage sales or even on private sales sites. The ideal is to select a trunk with potential and which has interesting elements to keep (old fittings, rivets, etc.).
Criteria to take into account:
- Size: depending on what you want to use it for (coffee table, storage, etc.), choose a trunk suited to your needs.
- General condition: choose solid and stable trunks even if they have some aesthetic defects.
- Style: opt for a model that matches your tastes and the style of your interior (industrial, vintage, etc.).
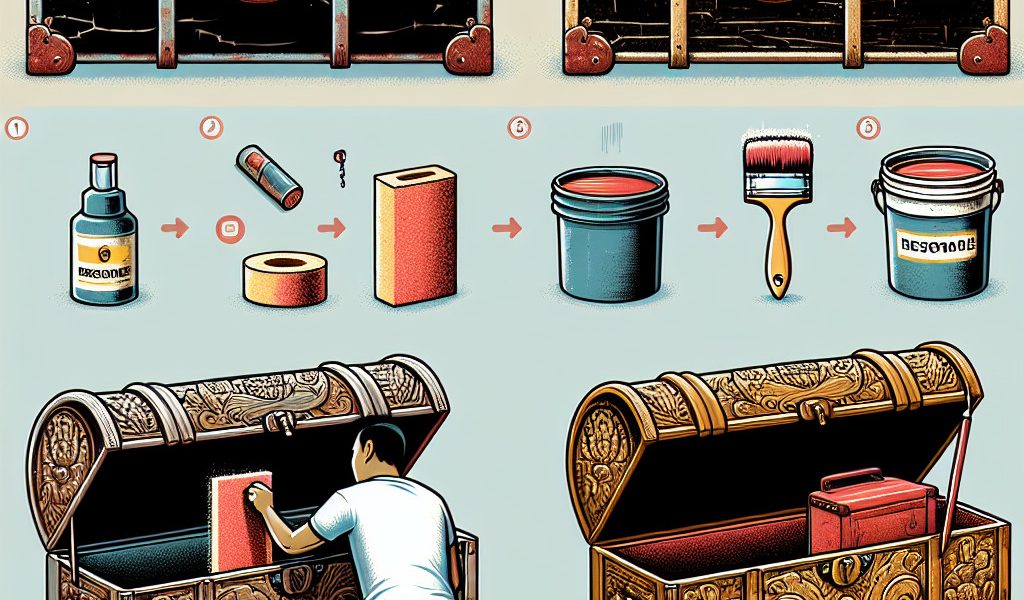
Step 2: Prepare the trunk before the makeover
Dismantle removable elements
Before starting the renovation, it is important to dismantle the removable elements of the trunk (handles, locks, etc.) in order to facilitate the work and avoid damaging these parts during the following steps.
Clean and strip the trunk
Then, thoroughly clean your trunk using a wire brush to remove rust and dirt. If necessary, use a suitable stripper to remove layers of old paint or varnish. Do not hesitate to lightly sand certain parts to obtain a more uniform surface.
Step 3: Revamp the exterior of the trunk
Paint or varnish:
Depending on your tastes and the style you want to give to your old trunk, you can opt for a colored paint or a transparent varnish which will highlight the natural wood. Apply several coats if necessary, respecting the drying times indicated on the product used.
Add patterns:
To further personalize your trunk, do not hesitate to add decorative designs such as stencils or self-adhesive wallpaper. However, be careful not to overload everything to maintain a certain harmony in your decoration.
Step 4: Renovate the metal elements
The fittings, rivets and other metal elements of your old trunk can be cleaned with a cloth soaked in methylated spirits or white vinegar. If you want to make them look new again, you can also paint them with a special paint for metals.
Step 5: Makeover the interior of the trunk
Line:
To give a facelift to the interior of your trunk, you can line the walls and bottom with wallpaper, fabric or even linoleum. Don’t forget to add a suitable layer of glue to ensure good adhesion of the chosen materials.
Add storage:
Depending on your needs, consider adding removable compartments or dividers to optimize the interior space of your trunk. You can use wood or featherboard to make these custom elements.
Step 6: Reassemble the trunk and admire the result
Once all these steps have been completed, all you have to do is reassemble the removable elements (handles, locks, etc.) and take full advantage of your new revamped trunk! Thanks to this meticulous and personalized work, you have succeeded in transforming this old object into a real decorative treasure which will bring character to your interior.
Conclusion
Revamping an old trunk takes time, patience and a little imagination. Don’t hesitate to draw inspiration from the many decorative ideas available on the Internet or in specialized magazines to create a unique object that will perfectly meet your expectations. So, don’t wait any longer and embark on this wonderful creative adventure!